Visa
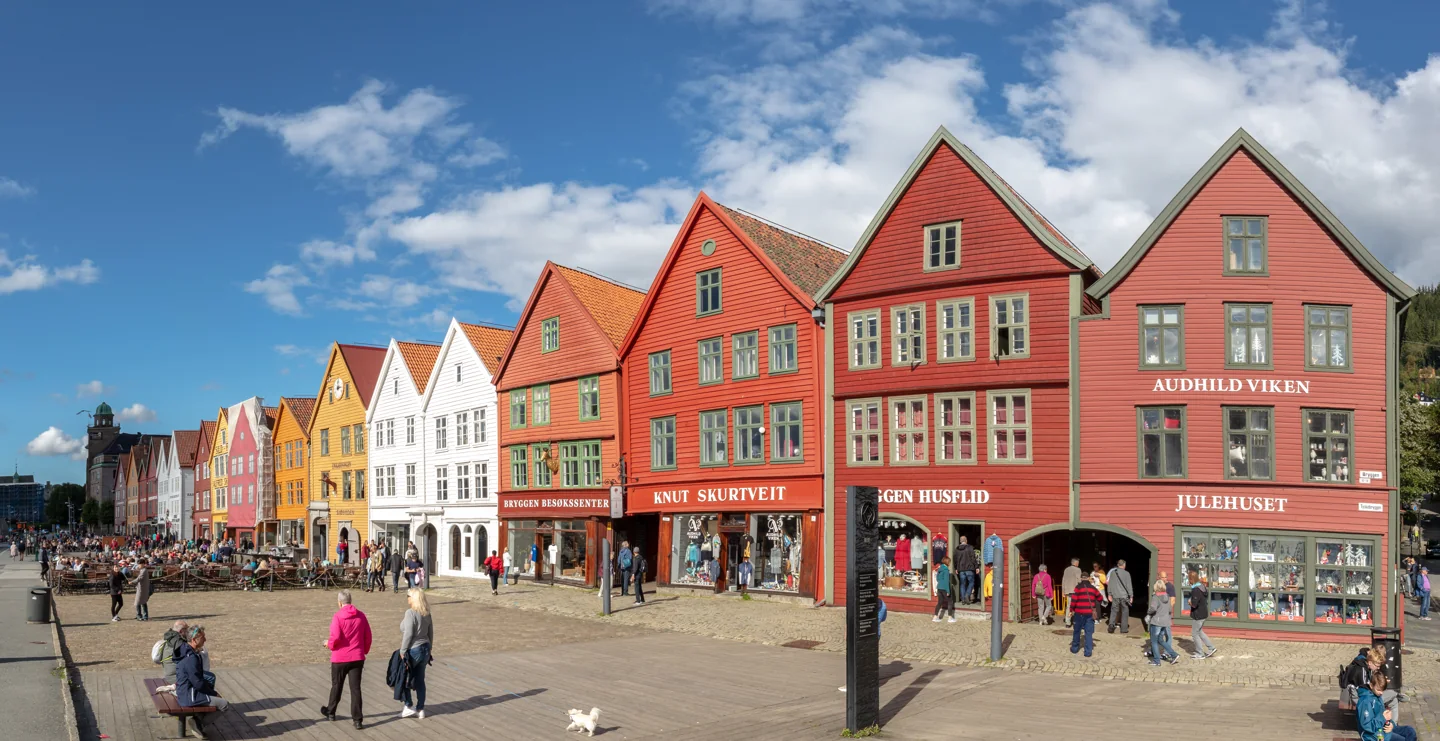
Moving & Living - Norway - Complete Guide
Move to Norway step by step: residence routes, employment, schools, tax, identity numbers, BankID, protected rental deposits, healthcare and everyday services.
Photo credit
Moving to Norway can mean a tram commute in Oslo, university life in Trondheim, work around Stavanger or a home in Bergen or Tromsø. The practical plan begins with the place and the residence route, then the documents that make work, housing, banking and healthcare usable.
This guide follows fourteen actions, from choosing a base to settling the first month. It distinguishes Nordic, EU/EEA and other-nationality processes, explains the difference between a D number and resident registration, and connects each stage to the institution responsible for it.
Norway at a glance
- Capital
- Oslo
- Currency
- Norwegian krone · NOK
- Telephone code
- +47
- Key identity records
- National identity number and D number are different
- Rent security
- Separate deposit account in the tenant’s name
- Routine healthcare
- Fastlege · municipality-based GP scheme
- Medical contacts
- 113 emergency · 116 117 out-of-hours care
- Reviewed
- 15 October 2026
Follow your moving journey
Start at step 1, or jump to the task you are working on.
01Choose a city around the journey you will make every day
Start with a workplace, campus or family address, then compare the neighbourhoods from which you could reach it comfortably. A home that looks close on a map can involve a steep walk, a transfer or a different fare zone. Test that journey before committing to a long lease.
| Starting point | What to investigate |
|---|---|
| Oslo: Grünerløkka, Tøyen or Majorstuen | Compare the exact tram, bus or T-bane connection, street noise, school catchment and the walk home. |
| Bergen: central neighbourhoods, Nygård or Sandviken | Check the route to work or campus, stairs and slopes, building ventilation and where you would store wet clothing. |
| Trondheim: Midtbyen, Elgeseter or areas near the relevant campus | Identify the actual teaching or work site, then test the bus and cycling options. |
| Stavanger and Sandnes | Use the employer's precise worksite; a city-centre address and a workplace outside it create different transport needs. |
| Tromsø | Inspect the approach to the building, winter access, heating and the transport arrangement for the hours you will travel. |
- Choose two areas, with one backup near a reliable transport connection.
- Book initial accommodation from which you can attend appointments and inspect homes.
- Compare the total monthly cost, including heating, transport and any after-school care, rather than rent alone.
- Ask how the building deals with deliveries, bicycles, waste and snow clearance before paying to reserve it.
For the Oslo area, use Ruter's ticket and journey information to establish the zones and service needed. These are places to investigate, not a ranking of cheap or safe neighbourhoods. The right choice depends on your actual address and routine.
02Match the immigration process to your citizenship and purpose
Norway's processes differ substantially between Nordic citizens, EU/EEA citizens and other nationals. A Schengen visit is a separate matter from living and working here. Start with citizenship, the proposed activity and the family relationships, then choose the relevant official branch.
- Nordic citizens: use the Nordic SUA checklist for tax and population-registration tasks rather than assuming the non-EU residence-permit procedure applies.
- EU/EEA workers: the official worker guidance explains the right to work during the initial three-month period and the qualifying basis needed for a longer stay. Employees staying longer must register with the police no later than three months after arrival; this is separate from reporting a move to the Tax Administration.
- Other nationals: choose a qualifying residence ground, such as the actual work, study or family route. For employment, the skilled-worker service is a starting point, not a guarantee that every job qualifies.
- Identify the ground and select your nationality in the official application service.
- Make a document list for that route, including who supplies employment, admission or relationship evidence.
- Complete the application, payment and document-submission stage in the location the instructions permit. Save the receipt and checklist.
- Use the decision's entry conditions and next steps when booking travel.
A non-EU family member of an EU/EEA citizen may need the residence-card process under those rules rather than the same permit as an independently employed applicant. SUA's non-EU/EEA instructions provide separate branches for these situations. Make a separate assessment for each dependent; do not assume an adult partner's work rights from the principal applicant's document.
03Turn the job offer into a usable work and payroll plan
Ask the employer which documents it supplies and whether it will handle any part of the residence application. Your contract should identify the legal employer, workplace, duties, pay, working hours and any accommodation deduction. Keep the signed version rather than relying on a recruitment message.
The Labour Inspection Authority explains the requirement for a written employment contract. Its minimum-wage guidance applies statutory rates in specified sectors; it does not establish one universal minimum wage for every occupation. Establish the applicable agreement and rate for the actual job.
- Agree the duties, qualification requirements, gross pay, payment date, probation and hours.
- If the job requires professional authorisation, obtain the responsible regulator's decision before treating the qualification as usable.
- Settle the start date against the immigration conditions. Do not confuse submitting an application with permission to begin.
- Give payroll your tax and payment details, and retain payslips showing hours, deductions and holiday-pay accrual.
For remote work, UDI's guidance treats work performed from Norway for a foreign employer or business as work here too. Do not relocate an overseas job on the assumption that a visitor stay authorises it. Confirm the residence basis and the employer's payroll and social-security arrangement.
If starting a sole proprietorship, or enkeltpersonforetak, use SUA's business checklist. It directs registration through the Brønnøysund Register Centre, with a Norwegian business address and an identification number; a D number can be requested as part of that process where applicable. It also explains advance tax and sector-specific requirements. Business registration and personal immigration permission are separate tasks.
04Budget the deposit and choose the appropriate tax scheme
Use Norwegian kroner, NOK, for the budget. Keep the money needed before payday separate from recurring spending. A rental deposit remains tied up during the tenancy and should not be counted as money available for groceries or travel.
| Initial costs | Recurring costs |
|---|---|
| Travel, extra luggage or freight, accepted translations and application charges | Rent and any separate heating or electricity |
| Temporary accommodation and the first rent | Food, local transport, phone and internet |
| The agreed protected deposit | Insurance, healthcare user fees and household supplies |
| Basic furnishings, winter clothing and initial school arrangements | Childcare or after-school care where applicable |
For a hypothetical calculation only, NOK 14,000 rent plus an agreed three-month deposit of NOK 42,000 means NOK 56,000 before travel and other costs. These are illustrative inputs, not a verified city rent or a legal requirement for three months. Obtain dated quotes for your actual home and move.
The Tax Administration's 2026 PAYE guidance publishes a 25% salary tax for eligible participants, or 17.4% for those exempt from Norwegian national-insurance contributions. The 2026 earnings ceiling is NOK 725,050, with other eligibility conditions. PAYE does not allow deductions and normally produces no tax return for that income. General taxation uses income and deductions and requires reviewing the return. Use the authority's comparison tools before choosing; the simpler option is not automatically cheaper.
Norwegian tax-residence guidance uses more than 183 days in twelve months or more than 270 days in thirty-six months. Keep a travel calendar and disclose foreign income and assets as required by your actual residence and treaty position. Population registration, immigration permission and tax residence answer different questions.
05Arrange school placement or the university application
In Oslo, the municipality's school guidance describes seven years of barneskole followed by three of ungdomsskole, normally starting in the year a child turns six. Public primary and lower-secondary schooling is free. Contact the school serving the proposed address and discuss previous schooling, Norwegian-language support and any learning needs.
- Identify the local school through the municipality's locator and tell it the child's age, address and intended arrival.
- Prepare identification, previous reports and relevant health or support information requested for placement.
- Agree the starting arrangements and language assessment rather than assuming an immediate place in an English-speaking class.
- For younger children, ask separately about kindergarten or before- and after-school provision. Oslo's AKS serves grades 1–4; its hours and payment arrangements are a separate household decision.
For higher education, choose the programme and teaching language first. NTNU's international master's procedure uses Søknadsweb and distinguishes applicant categories. Prepare the passport, academic records, English evidence, CV and applicable funding documents; follow its country-specific verification and translation instructions. The page's dated 2026-entry application windows are already past at this review, so establish the correct next cycle instead of treating them as open.
NTNU's 2026–27 fee schedule charges most non-EU/EEA/Swiss students unless an exemption applies. Its Category 1 annual rate is NOK 176,300 for 60 ECTS; Category 2 is NOK 205,600. Some named programmes have separate lower fees. Residence in Norway alone does not establish an exemption. Use the programme's actual invoice or exemption decision, and budget living costs separately.

06Resolve the residence basis and pension healthcare
Retirement income should be treated as funding, not as a residence permission in itself. No general pension-income retirement visa was verified for this guide. An EU/EEA household relying on its own funds should establish the applicable right-of-residence and insurance conditions; other nationals need an independently qualifying route. Buying a Norwegian home does not replace that process.
- Identify the residence ground for each adult before signing a long tenancy or purchase agreement.
- Ask the pension administrator about overseas payment, tax withholding and any proof-of-life procedure.
- Establish whether your healthcare remains the responsibility of another country or falls under Norwegian rules.
- Inspect stairs, lifts, bathroom access, heating and the route to a clinic, including winter access.
Helfo's pensioner guidance explains certificate S1 for eligible people moving from another EU/EEA country, Switzerland or the United Kingdom. Obtain it from the responsible pension/insurance institution and submit it to Helfo as instructed. Norwegian user fees can still apply; dependent family members' documents must also be resolved. Starting work can change the arrangement and must be reported.
The same guidance makes non-EU/EEA pensioners' coverage dependent on lawful residence and membership of the National Insurance Scheme. The healthcare explanation does not grant immigration permission. Obtain a clear answer for your own household, particularly where pensions come from several countries.
Plan the everyday side too: local transport, prescription renewal, help during illness and the cost of visiting family. An accessible apartment near services may be more useful than additional space far from them.
07Prepare the originals, shipment declaration and pet itinerary
Keep passports, decisions, employment or admission papers, family-status certificates, insurance and accommodation details in hand luggage. Carry originals separately from backup scans. Match names across documents before ordering certified translations or authentication.
Norwegian Customs' moving-goods guidance describes relief for eligible household goods after at least a continuous year abroad, where you owned and used them and will continue using them in Norway. Import must be connected with the move and normally within a year. Prepare declaration RD0030, a packing inventory and any authority needed by the carrier. A vehicle or restricted item needs its own assessment.
If you lack a Norwegian identification number, the same service explains obtaining a Customs TRK number so a representative can declare the goods. Give the mover that information before dispatch; a container arriving is not the same as completed customs clearance.
- Obtain an itemised freight quote including clearance, storage and final delivery.
- Ask about restrictions before packing plants, food, medicines or unusual equipment.
- Give the carrier your signed declaration, inventory and actual arrival details.
- Retain the clearance and delivery records with the household file.
For dogs, cats and ferrets arriving from the EU, Mattilsynet's checklist covers identification, rabies, the pet passport and dog tapeworm treatment. The usual dog-treatment window is 24–120 hours before entry; cats and ferrets do not need that treatment. Rabies and treatment exceptions depend on the journey, including special arrangements involving Sweden and certain other countries. Use the origin-specific guide for non-EU travel rather than applying the EU checklist universally. Arrange the veterinary appointments around the actual route and border crossing.
08Use the decision's arrival instructions and attend the right office
Carry the first address, host contact and the documents supporting the purpose of your stay. For a residence-permit holder, read the decision's entry conditions and police instructions before booking the flight. A Schengen visa's validity and the conditions of a Norwegian residence decision are different matters.
The non-EU/EEA SUA instructions say that applicants applying abroad, or whose employer applies for them, should not book an appointment merely to lodge that application at SUA. After approval and travel to Norway, the relevant police appointment is used to present documents, take a photograph and order the residence card. Follow the booking category that matches your case.
- Reach the accommodation and make sure your name and full address can be used for official post.
- Confirm the police or tax appointment and the supporting documents requested for that service.
- Keep a record of the entry date and any appointment or application reference.
- Tell the employer or school you have arrived and establish the next reporting or attendance task.
Service Centres for Foreign Workers bring police, tax and labour guidance together in Oslo, Stavanger, Bergen, Trondheim and Kirkenes. They assist foreign workers, their families and employers. Use the appointment selector rather than assuming every office handles every task on a walk-in basis.
For an initial airport journey, buy for the actual operator and destination. Do not assume that a city ticket covers every express service. Save the receipt and allow enough time for a delayed flight without missing a required appointment.
09Complete population registration, identification and the tax card
Norway uses both a national identity number, or fødselsnummer, and a D number. The Tax Administration's explanation says these are assigned when the relevant conditions are met; you do not simply apply for whichever number you prefer. A D number identifies a person but does not prove registration as a resident.
- For an EU/EEA move lasting at least six months, follow the worker move-reporting checklist: complete the notification, book the tax appointment and bring identity and evidence of the right of residence and intended stay.
- If you have a residence permit, establish whether its type leads to automatic resident registration. The Tax Administration's permit-specific instructions explain that some people instead receive a D number and must report the move themselves.
- Make sure the office has the correct postal address, and retain the decision or confirmation.
- If working, arrange the tax deduction card, skattekort, and have payroll confirm that it has retrieved the correct record.
The permit-specific service also distinguishes a move report within thirty days of D-number assignment from a later report requiring a new ID check. Use the branch matching your record. Bring the supporting evidence for that appointment rather than assuming the police and tax desks require identical documents.
Nordic workers can use the Nordic SUA tax checklist with a passport or national ID, contract or written offer, and the applicable tax-card form unless the employer has applied. A tax card is not an immigration permit. Keep the payroll start arrangements separate from waiting for a bank card or electronic login.
10Open the account and then arrange electronic identification
Start by asking the bank which documents it accepts for your citizenship and residence situation. Have the Norwegian identification number, passport, address and employment or study evidence ready. A bank's online application is part of its assessment, not a guarantee of immediate opening.
DNB's newcomer instructions describe applying first and then proving identity at a branch. The service warns that the process can take four to six weeks. Its alternative identification arrangements for refugees and asylum seekers have their own scope; they are not a universal passport exemption. Ask how an EU/EEA registration document or your particular permit is evidenced in the application.
- Compare the basic account, debit card, payment services, branch access and tariff.
- Submit accurate information about the purpose of the account, tax residence and expected payments.
- Attend the identity appointment and provide any additional documents requested.
- When activated, test a small payment, then give payroll the exact account number.
Next establish which electronic identification you can obtain. SUA's digital-service explanation distinguishes BankID, issued through banks, from MinID, which uses an activation-letter process for public services. BankID is not automatically issued merely because an account exists. Ask which services your actual login supports.
Keep a backup card and a way to pay for initial accommodation while setup is pending. For bills, copy the account and KID payment reference carefully where supplied. Agree the protected rental-deposit process with the bank and landlord; it is separate from the ordinary account used for monthly rent.
11Inspect the home and use a proper deposit account
Terms you will encounter include husleie (rent), depositum (deposit), leiekontrakt (lease) and strøm (electricity). Inspect the exact unit. Ask what the advertised price includes, how heating works and whether the furniture shown remains in the apartment.
- Check ventilation, damp, windows, heating, hot water and the available internet connection.
- Obtain the landlord's identity and authority to let the home; establish who signs if an agent conducts the viewing.
- Agree the term, notice, rent, included services, occupants, pets and repair responsibilities in writing.
- Photograph existing damage, complete an inventory, record meter readings and keep the handover receipt.
The Consumer Council's deposit guidance requires a separate account in the tenant's name, with neither party able to withdraw alone. The landlord pays the account-opening fee and cannot demand that the deposit be paid in cash or into the landlord's own account. The deposit cannot exceed six months' rent. Agree it when entering the tenancy; the landlord cannot add a new deposit demand afterward.
Use the council's rental checklist and contract resources to document the arrangement. If you do not yet have the banking evidence needed for a deposit account, resolve an acceptable arrangement with the bank and landlord before transferring money. A guarantee product and a cash deposit are different commitments; obtain the price, refund conditions and continuing liability before choosing either.
At move-out, use the handover record to discuss cleaning, damage and deposit release. Keep the agreement and payment trail together so a disputed deduction can be assessed against evidence.
12Confirm coverage and your route to a fastlege
Establish insurance for the journey and any gap before Norwegian entitlements are settled. NAV's membership guidance distinguishes residence-based membership, employment and social-security agreements. Membership is not determined simply by citizenship, paying Norwegian tax or being in the Population Register. Posted workers and people covered by another country's system need a specific assessment.
The GP guidance on Helsenorge links the right to a fastlege to registration as resident in a Norwegian municipality. A D number alone generally does not give that entitlement, though defined exceptions apply. Necessary medical treatment remains available through the municipality; do not postpone care merely because the GP-list task is unresolved.
- Confirm the coverage basis for each family member and any S1 or other evidence needed.
- Use Helsenorge or its guidance service to establish GP entitlement and available lists.
- Keep a short medical summary, prescriptions and vaccination records, and arrange ongoing treatment before existing supplies run out.
- Ask the provider which user fee, referral and payment arrangements apply; public care does not mean every service is free.
If electronic access is not ready or you are unsure about GP rights, Helsenorge lists +47 23 32 70 00 for guidance. For urgent care outside normal GP hours, contact legevakt on 116 117; for a life-threatening medical emergency call 113. Tell the service your precise location and immediate symptoms.
Ask separately about dentistry, private treatment and travel outside Norway. An employer's supplementary policy may have different limits from public coverage, and a foreign policy may require prior authorisation.
13Set up communications, energy and local transport
Start with a phone service that can be registered using the documents you actually have. Mycall's prepaid and subscription service is one practical starting point; it lists a shop at Brugata 1 in Oslo and prepaid starter packs. Bring identification and ask which registration process applies before buying. Confirm the data allowance, validity, renewal and international-call costs rather than choosing from the starter price alone.
For the home, ask the landlord to identify the electricity meter or metering-point information and the opening reading. Use the energy regulator’s contract guidance and establish whether you need your own electricity-supply agreement, how grid charges are handled and which costs are included in rent. Keep written confirmation of the start date and avoid paying the previous occupant's unexplained balance.
- Test phone reception inside the apartment.
- Confirm fixed-internet availability at the precise address, installation dates, equipment and cancellation terms.
- Record heating and hot-water arrangements, the meter reading and responsibility for each bill.
- Ask the building manager about waste sorting, collection points and shared laundry or bicycle facilities.
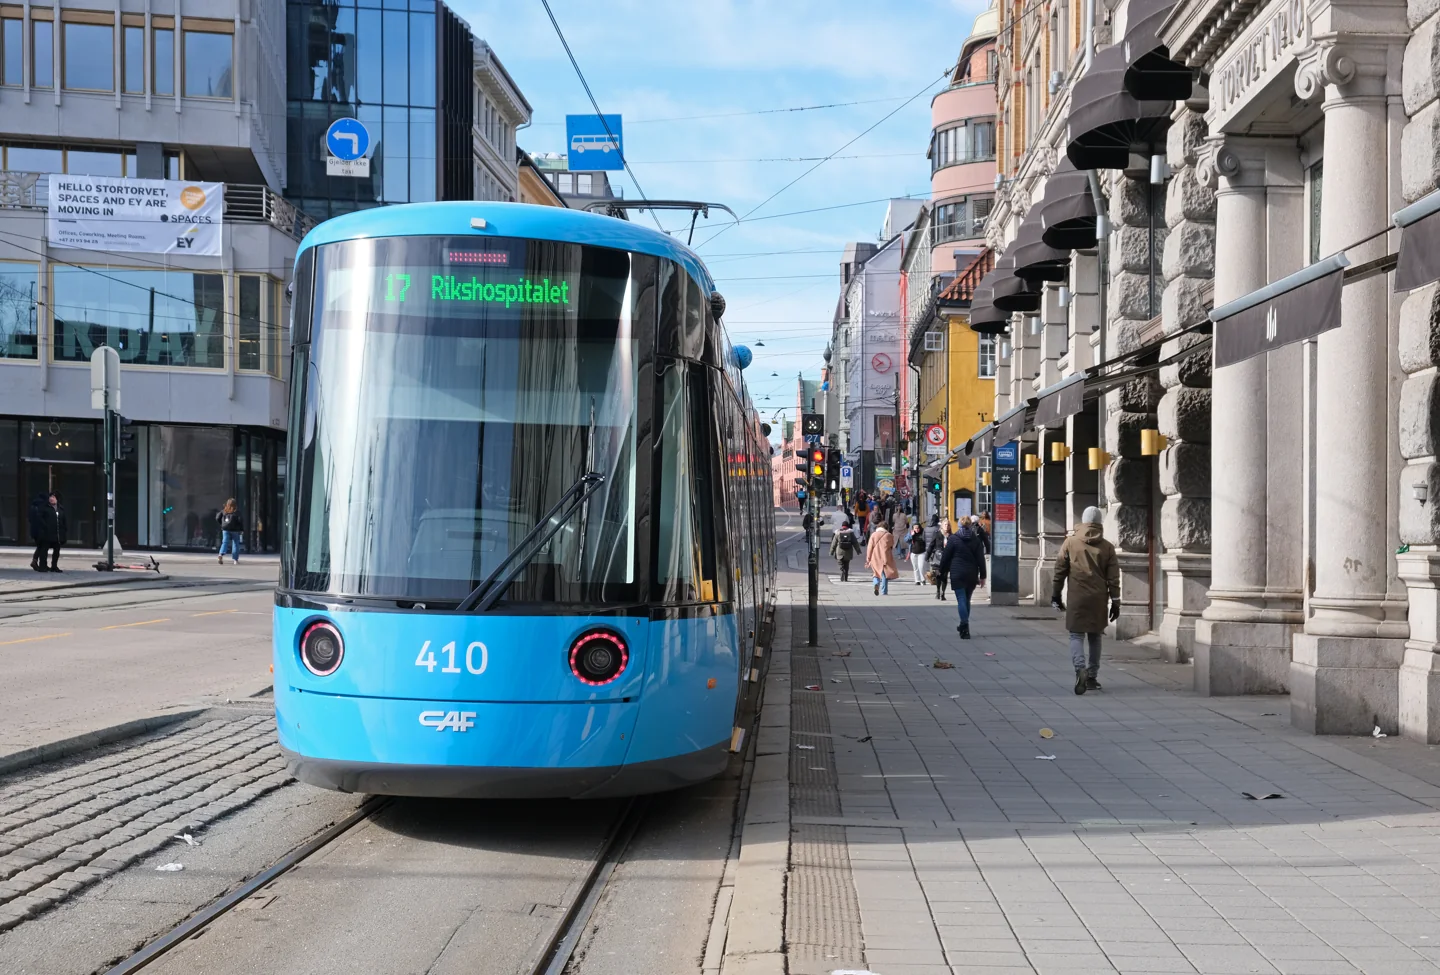
In Oslo and the surrounding area, Ruter's ticket information distinguishes single journeys from period tickets. A one-zone single ticket lasts sixty minutes, with additional time for extra zones. Buy for the actual zones and make sure the ticket is valid for boarding; consult the current timetable for transfers. Other cities use their own transport systems, so do not assume an Oslo ticket applies in Bergen or Trondheim.
Test the complete commute before the first workday, including the walk at each end and a fallback if a connection is missed. If planning to drive, establish licence recognition, exchange deadlines and vehicle import separately before buying or shipping a car.
14Build a routine and close the remaining administrative tasks
Use a shared checklist with separate entries for every family member. Record the responsible authority, application reference, next action and date. That is more useful than a folder of receipts with no indication of what remains outstanding.
- First days: make the required arrival appointments, establish official post delivery, test the phone and contact the employer or school.
- First working weeks: complete the appropriate tax and identity tasks, confirm healthcare arrangements and inspect housing.
- At handover: sign the inventory, protect the deposit, record readings and establish bill responsibility.
- Before month end: check the first payslip, account access, tax-card details and school routine, and add renewal reminders from the actual documents.
Keep copies of important electronic correspondence before an identification-number change. Ask each provider whether its record needs updating when a D number is replaced; avoid assuming all private accounts update automatically.
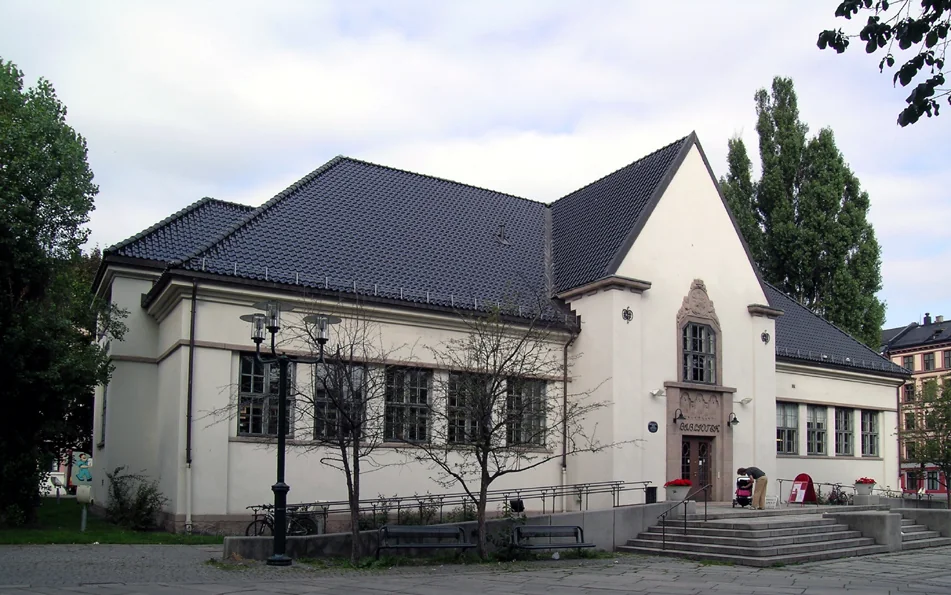
For community, use the Deichman library service in Oslo as a starting point for finding a branch, checking borrowing arrangements and exploring its current events. Ask about language activities for your level and schedule rather than assuming a class is available every day. A sports club, parent group or regular local activity can also help build a routine around the neighbourhood you chose.
Finally, compare the budget with actual bills. Separate deposits and one-off setup expenses from the ongoing cost of the home. If the commute, heating cost or school pickup is harder than expected, adjust that practical problem while it is still manageable. Keep appointments and deadlines visible, but leave enough time to learn the ordinary places around you: the nearest grocery shop, transport stop, library and walking route.
Sources & further reading
Reviewed 15 October 2026. Sources are linked beside the relevant instructions. Reviewed 15 October 2026. Nordic, EU/EEA and other-nationality routes differ. Identity, tax residence and insurance membership are separate. UDI and Ruter restricted native access; relevant indexed primary material and independent SUA instructions were used without bypassing restrictions. Programme and nationality-specific checklists remain essential. Reviewed 15 October 2026. NTNU figures apply to named 2026–27 tuition categories and are not living costs. Housing arithmetic is hypothetical. PAYE rates and ceiling are 2026-specific. No invented national monthly living budget, visa fee or current transport fare. Photograph credits, licences and capture years appear with the images.
Browse the source directory
- Ruter — ticket types and validity
- SUA — Nordic worker appointments
- SUA — EU/EEA workers, identity and digital services
- UDI — EU/EEA employee registration
- UDI — skilled-worker route selector
- SUA — non-EU/EEA permits and family cards
- Labour Inspection — written employment contracts
- Labour Inspection — sector-specific minimum wages
- UDI — remote work performed in Norway
- SUA — sole-proprietor registration and tax
- Tax Administration — PAYE in 2026
- Tax Administration — residence and worldwide tax liability
- City of Oslo — school placement and language support
- NTNU — international master’s application
- NTNU — 2026–27 tuition and exemptions
- Helfo — pensioner healthcare and S1
- Norwegian Customs — moving goods and TRK
- Food Safety Authority — EU pet-movement checklist
- SUA — locations and services
- SUA — nationality-specific appointment service
- Tax Administration — identification numbers
- Tax Administration — permit-specific resident registration
- DNB — newcomer account and identity process
- Consumer Council — protected rental deposits
- Consumer Council — rental contracts and handover
- NAV — membership and international agreements
- Helfo — fastlege rights and urgent-care contacts
- Mycall — prepaid service and shop contact
- Energy regulator — electricity-supply agreements
- Deichman — library information in English
Make your next step a practical one
Choose the residence branch and actual work, school or family destination, then prepare the household documents and the first-month cash plan before committing to a home.